Resolutions and Challenges

Well an old year has gone and new one is on its way.

Achievements of 2016

Each year, like everyone else, I make some resolutions and do my best to achieve each of them during the year. I can say that last years achievement I am most proud of was giving up soda and any other carbonated drinks. After a lifetime of drinking carbonated drinks this was harder to achieve than I expected it would be.

I can now say though that while eating at restaurants I really enjoy drinking water now and when I see my savings on the check it makes me feel a bit better.

At the same time I wanted to make sure that I didn’t replace carbonated drinks with high sugar drinks. Again a success and I found a new taste for a Green Tea.  Success!!

On the technical front last year was quiet and I decided to focus my time on getting more comfortable with my current knowledge set and just enjoy what I had.

Resolution for 2017

For my personal achievements I want to stop going out to eat as much as we normally do and instead eat at home more often. When I discussed this with my wife it caused some initial frustrations but I explained to her with the savings it will help achieve my other resolution for the next year. I would like for our family to take either a European vacation or something that allows us to travel to the east coast.

On the technical front I have the following planned:

  • Rewrite dooscrib.com with a Swift and Vapor backend.
  • Complete the first phase of smart mirror project.
  • Update iOS apps with more features.
  • Start going to more programmer meetings again.
  • Do a presentation on Vapor and Server Side Swift.

As I complete or work on some of my resolutions for the new year I will write about them and share my experiences.

Until then Happy Coding!!!


VNC Experiences on Raspberry Pi

I wanted to share some experiences of getting VNC setup on my Raspberry Pi.

How hard could the experience be? A basic search on google and there are a ton of tutorials and examples to follow getting everything setup. Being a fan of adafruit I followed a detailed tutorial they had for setting up VNC which can be found here.

Initially it was working great till I noticed that I wasn’t accessing the current session. For most configurations I suspect this works fine but for my current project I want my VNC session to use the active session that I would see if I had a KVM (keyboard, video, mouse) plugged into my Pi.

Certainly I am not the first to notice or expect this. After trying different configurations and researching things further I discovered that the VNC tool used in all of the tutorials (tightvnc) doesn’t support access to the current session. Apparently in order to achieve this I would have to install and run X11VNC.

The following is the steps that I took to get everything setup:

Install X11VNC

Open a terminal session on your Raspberry Pi and run the following:

sudo apt-get update
sudo apt-get install X11VNC

When installing X11VNC it will want you to confirm the install so make sure to answer Yes to these questions. After it’s done installing you could run x11vnc but you’ll probably want it to work automatically after restarting your Pi.

Setting up X11VNC

In your terminal session you will want to setup a password that can be used when connecting. To set this up you will want to do the following:

x11vnc --storepasswd

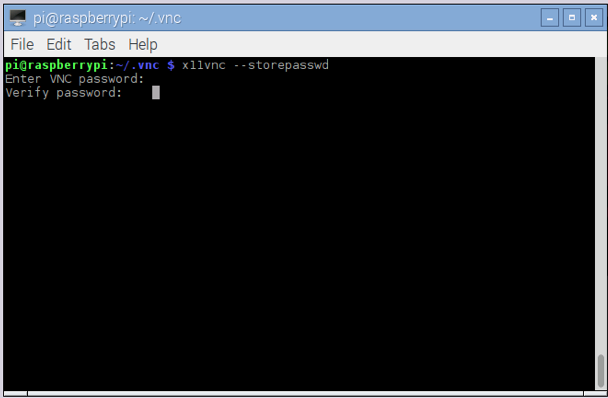
When you are done x11vnc should report back that the password was written at /home/pi/.vnc/passwd. For some assurances I checked the file because I didn’t like the idea of password being stored in plain text.

Next you’ll want to set everything up so that x11vnc is running whenever your pi is started. In your terminal session change to the config directory.

cd /home/pi/.config

There should already be an autostart directory but go ahead and run a list to see everything that exists in the directory.

ls

If you do not have an autostart directory then you will need to create one by using mkdir.

Go ahead and change to the autostart directory.

cd autostart

Next you’ll want to create an entry for x11vnc.
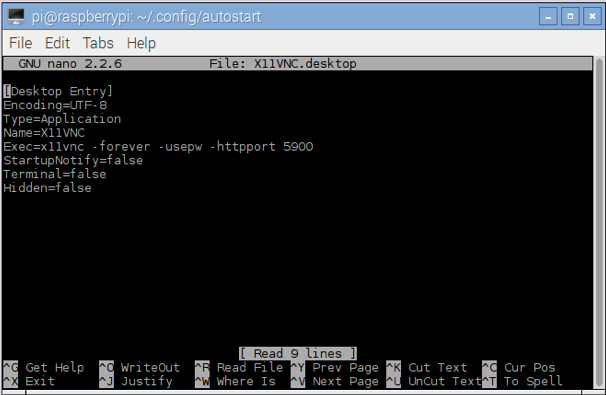
nano X11VNC.desktop

Add the following changes to the file:

[Desktop Entry]
Encoding=UTF-8
Type=Application
Name=X11VNC
Exec=x11vnc -forever -usepw -httpport 5900
StartupNotify=false
Terminal=false
Hidden=false

To close hit Ctrl-X to keep the changes and exit. Next you will want to restart your Pi.

Testing X11VNC

Your configuration might be different than mine however I am running OS X and I can use the built in VNC viewer from Finder. By clicking on the desktop or if you already have a Finder window open you can do a Cmd-K to connect to a VNC Server.

You will want to enter the address of your Pi using the following format:

vnc://<IP Address>:<Port Number>

If you need to get the IP address of your Pi you can run ifconfig from a terminal session on it. Once you have entered the Server Address Click on Connect and you should be prompted to enter the password that you supplied.

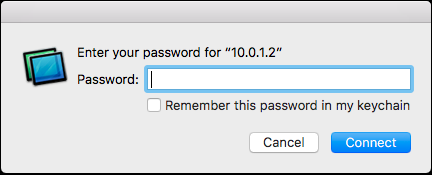
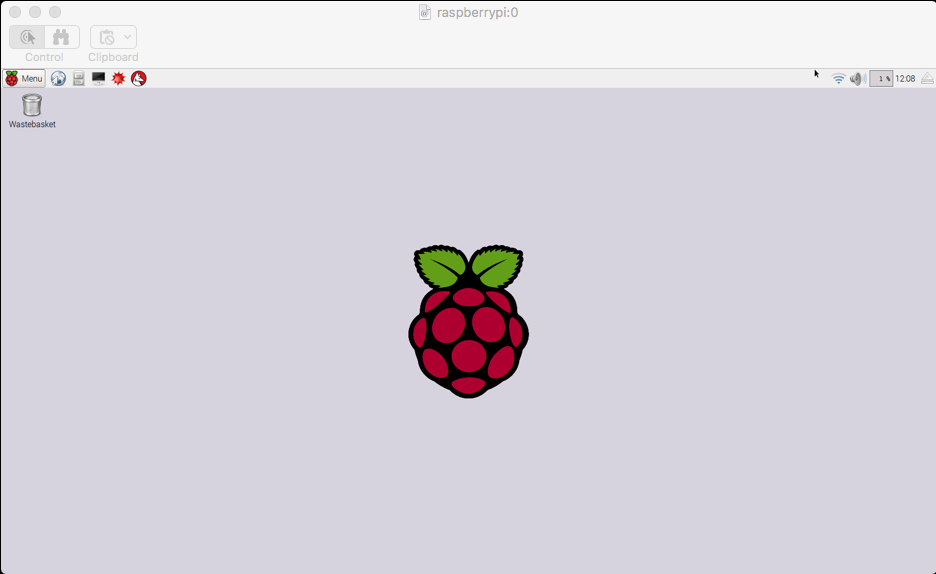
You should now be connected.

Enjoy and as always Happy Coding!!!

Setting up Ubuntu – Getting Ready for Server Side Swift

So this is going to be a quick step by step tutorial on the steps that I took setting up Ubuntu inside of VirtualBox on my Macbook Pro. Before we get started make sure you have VirtualBox Installed.

You can get a copy here.

While you are installing VirtualBox you will want to download a version of Ubuntu that you can use in your configuration. I wanted a graphical desktop so I downloaded Ubuntu Desktop which you can get here.

As just a personal preference I store my ISO images in a folder that is easily accessible from the desktop. Your choice on where you put it just make sure it’s somewhere easy for you to get to.

Setup

With VirtualBox installed and your ISO image for Ubuntu downloaded let’s get started. Go ahead and start VirtualBox.

Create a new Virtual Machine by clicking on the New button.

Screen Shot 2016-08-25 at 10.22.01 PM

Name Virtual Machine

Next you will want to setup and name your virtual machine. For this example I took the name directly from the name of the ISO image downloaded ubuntu-16.04.1-desktop and use that as the name. Once I set my name the Type (Linux) and Version (Ubuntu (64 bit version)) were automatically updated.

Screen Shot 2016-08-25 at 10.32.36 PM

Memory Configuration

Your ability to configure memory for your virtual machine will be limited by your machines physical configurations. I am fortune enough to have a lot of memory installed on my MacBook Pro.

On the Ubuntu configuration page it recommends 2 GB of system memory so to play it safe I doubled that number to 4 GB.

Screen Shot 2016-08-25 at 10.38.11 PM

Setting up Disk

I already know that I want to do some development on this image so I made the decision to give it more disk space for future development.

In my configuration I am going to create a 100 GB Fixed size VirtualBox Disk Drive.

Screen Shot 2016-08-25 at 10.45.17 PM

Screen Shot 2016-08-25 at 10.46.09 PM

Screen Shot 2016-08-25 at 10.46.59 PM

Screen Shot 2016-08-25 at 10.48.03 PM

Start your Virtual Machine

With the VirtualBox all setup and ready to run it’s now time to get Ubuntu running. Select the image that you just created and the click the Start button.

Screen Shot 2016-08-25 at 10.22.01 PM

It’s first question will be to prompt you for a optical disk image to use for installing Ubuntu. You will want to browse to wherever you downloaded Ubuntu and select it.

Screen Shot 2016-08-25 at 11.00.08 PM

Some message and error prompts that may come up that you can either clear or click the OK button on to get rid of.

Screen Shot 2016-08-25 at 11.01.06 PM

Screen Shot 2016-08-25 at 11.02.56 PM

Install Ubuntu

These next few screens are steps that I took for my configuration. Review them during your installation and make any adjustments that are appropriate for your preferences.

On the first screen you will of course want to click on Install Ubuntu.

Screen Shot 2016-08-25 at 11.05.37 PM

Screen Shot 2016-08-25 at 11.07.11 PM

Screen Shot 2016-08-25 at 11.08.01 PM

Click Continue

Screen Shot 2016-08-25 at 11.08.53 PM

Screen Shot 2016-08-25 at 11.09.59 PM

Screen Shot 2016-08-25 at 11.10.58 PM

Screen Shot 2016-08-25 at 11.12.35 PM

When you are all finished with the installation it will prompt you for restarting your machine. As just a reminder it is referring to the Virtual Machine that was created earlier.

Click the Restart Now button.

Screen Shot 2016-08-25 at 11.15.15 PM

When it prompts you to remove the install media just click the Ok button to proceed. All that is left now is to login and enjoy.

Screen Shot 2016-08-25 at 11.19.26 PM

Done

With Ubuntu running we are now ready to start on the next step of installing Swift 3 and getting ready to start using Vapor. That will come in a future post and for now check out Ubuntu and get comfortable with it.

Screen Shot 2016-08-25 at 11.23.33 PM

Keep following and as always Happy Coding.