Category Archives: objective-c

Tracking User Touches with UIImageView

Whether you are having a user draw pictures or allowing the drag elements on the screen there are multiple purposes behind being able to track the location of a users touch in your app. I am going to document a quick example that I recently developed for an app that I have developed.

In this example I am documenting how to track a users touch location. Hopefully this example will give you something to build on for whatever you have in mind.

Create Project

Layout Screen Design

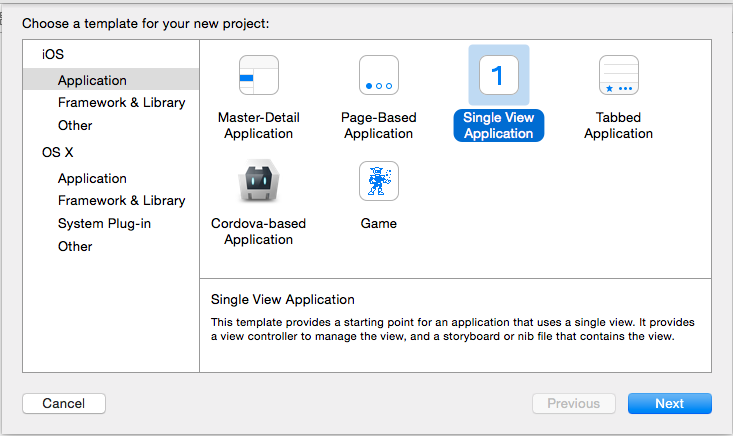
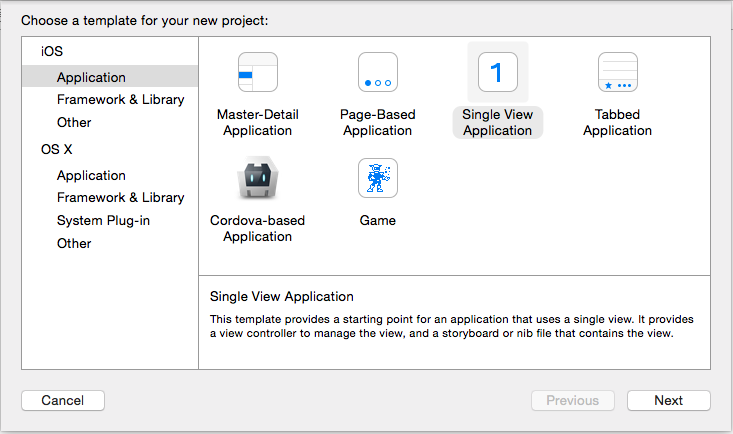
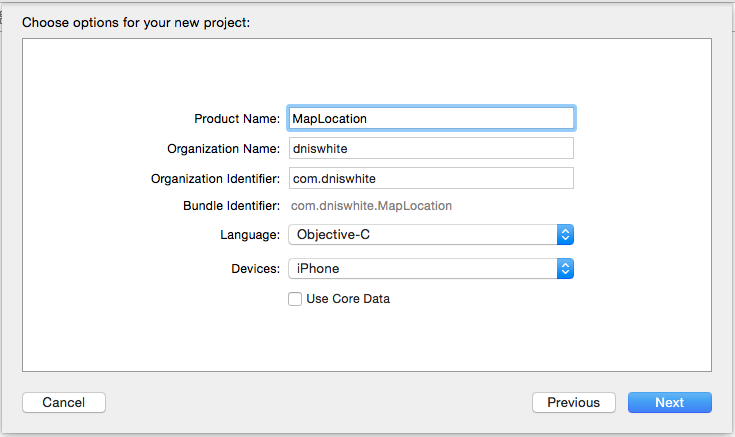
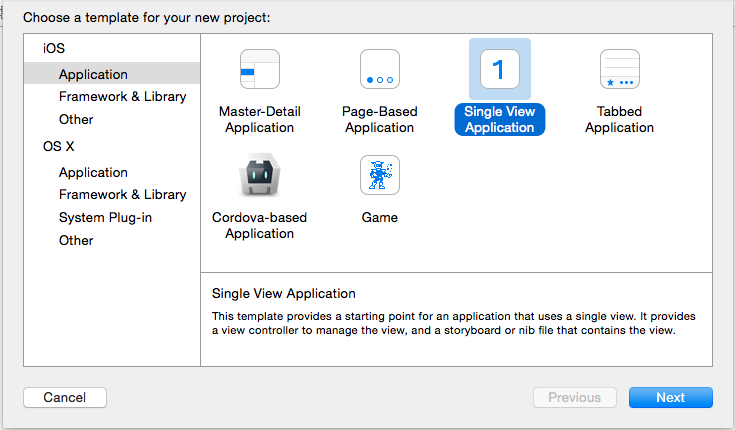
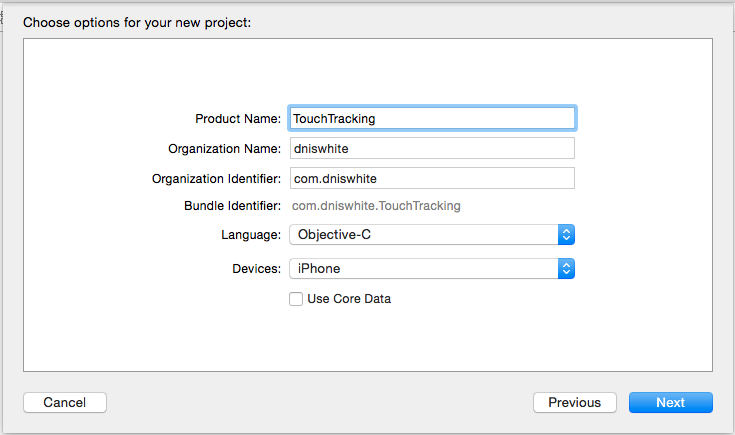
Start off with create a Single View Application:

Screen Shot 2015-05-04 at 10.45.09 PM

Screen Shot 2015-05-04 at 10.46.12 PM

Layout Screen

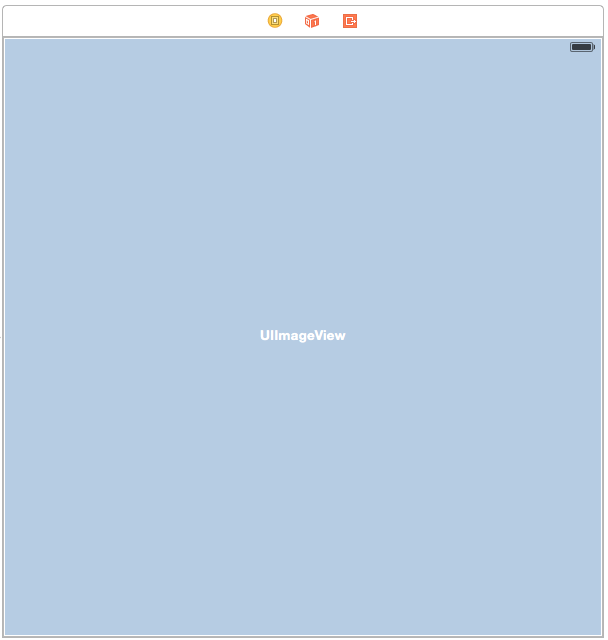
With the project setup complete click on the projects storyboard (Main.storyboard) and add a Image View to the view. You will want to stretch it out so that it uses the entire display is used as well as add Constraints so that control will be sized for whatever device used.

Screen Shot 2015-05-04 at 11.02.49 PM

With the view setup complete the next step is wiring the UIImageView control into a property for the ViewController.

With the storyboard editor still open click on the Assistant Editor so that both the storyboard and ViewController.h are displayed.

Screen Shot 2015-01-25 at 3.30.55 PM

Then control drag and create a property for the UIImageView:

@property (weak, nonatomic) IBOutlet UIImageView *imageView;

After that is done you can close the Assistant Editor and you will now begin to work on the code that will track the user touches.

Tracking Touches

The rest of the work will be handled in the implementation of the ViewController so click on ViewController.m.

First change the interface to include some properties so that you can track the difference between a user moving their finger or just tapping the screen.

@interface ViewController () {
    bool isMoving;
    CGPoint lastTouchLocation;
}

Then in the viewDidLoad method make sure to initialize the isMoving property.

- (void)viewDidLoad {
    [super viewDidLoad];

    // Do any additional setup after loading the view, typically from a nib.
    isMoving = NO;
}

Touch Events

Now it’s time to add the methods that will called when the user has touched the screen, is moving their finger and when they have stopped touching the screen. For right now just add the following code and then later we’ll come back and fill them each with more code.

-(void) touchesBegan:(NSSet *)touches withEvent:(UIEvent *)event {
}

-(void) touchesEnded:(NSSet *)touches withEvent:(UIEvent *)event {
}

-(void) touchesMoved:(NSSet *)touches withEvent:(UIEvent *)event {
}

For each of the methods we’re going to use the following common set of code that will get adjusted to better match each method:

// get one touch event from the NSSet that was passed.
UITouch *touch = [touches anyObject];
// from the touch event get the x,y coordinates via a CGPoint
CGPoint currentLocation = [touch locationInView:[self imageView]];

For both the touchesBegan and touchesMoved method we are going to want to record the location in the lastTouchLocation property. This will allow us to track not only where the users finger is on the screen but more importantly where it was previously. Also need to set the boolean variable isMoving so that in the touchesEnded method we can determine whether the user tapped the screen or dragged their finger.

Change both the methods to match the following:

-(void) touchesBegan:(NSSet *)touches withEvent:(UIEvent *)event {
    UITouch *touch = [touches anyObject];
    CGPoint currentLocation = [touch locationInView:[self imageView]];

    isMoving = NO;
    
    lastTouchLocation = currentLocation;

    NSLog(@"user has started to touch screen %@.", NSStringFromCGPoint(lastTouchLocation));
}

-(void) touchesMoved:(NSSet *)touches withEvent:(UIEvent *)event {
    isMoving = YES;
    
    UITouch *touch = [touches anyObject];
    CGPoint currentLocation = [touch locationInView:[self imageView]];

    NSLog(@"user is moving from %@ to %@", NSStringFromCGPoint(lastTouchLocation), NSStringFromCGPoint(currentLocation));
    
    lastTouchLocation = currentLocation;
}

Finally you will want to handle the touchesEnded method with the following code that will be able to determine whether the user just tapped the screen or actually dragged their finger across it.

-(void) touchesEnded:(NSSet *)touches withEvent:(UIEvent *)event {
    
    UITouch *touch = [touches anyObject];
    CGPoint currentLocation = [touch locationInView:[self imageView]];

    if (YES == isMoving) {
        NSLog(@"user finished moving from  %@ to %@.", NSStringFromCGPoint(lastTouchLocation), NSStringFromCGPoint(currentLocation));
    } else {
        NSLog(@"user just tapped the screen without moving at %@.", NSStringFromCGPoint(lastTouchLocation));
    }
}

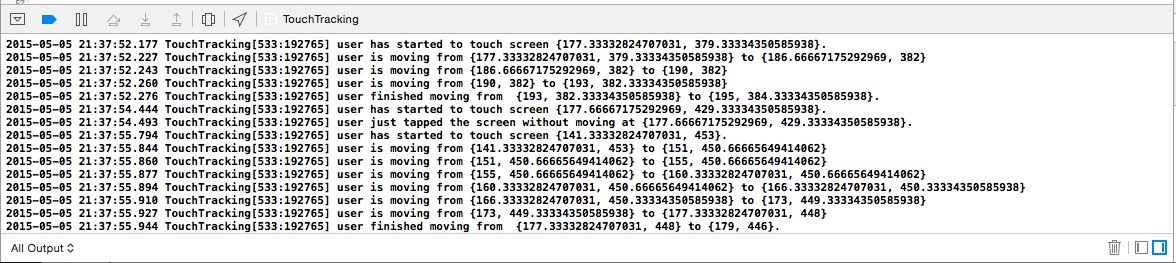
Go ahead and run the code in your debugger and as you tap or drag your finger across the screen you should see messages being logged in the debugger.

Screen Shot 2015-05-05 at 9.38.06 PM

As I mentioned earlier whether you are having a user draw pictures or allowing them to drag elements on the screen there are multiple uses to tracking the location of a users touch in your app.

For now you can find the source here and as always Happy Coding!!!

Adjusting View so Keyboard doesn’t hide a UIControler

I have been working on an application that has a screen where a user can view and edit their profile information. One of the problems that I have had to confront is that certain fields were getting covered by the keyboard and making it impossible for the user to be able to enter or update information.

Certainly this had to be answered by someone on Stack Overflow or somewhere else in the land of the internet that Google has had a chance to index. I found ideas and some samples out there but nothing that really dealt with a way to handle a screen that might have multiple UIControls getting hidden.

I found How to make UITextField move up when keyboard is present which gave some ideas and helped to serve how I resolved my situation. One of the areas of interest is the demonstration about how to get the size of the keyboard. With today’s varying size iPhones this is important because for each device the keyboard changes in its display size. It actually is a great read so if you haven’t already reviewed it let me give you a few minutes to go check it out.

In the sample application I am going to create a view that has two UITextFields that will be visible when the keyboard and another 2 that are hidden when the keyboard comes up.

Screen Shot 2015-02-25 at 6.27.59 PMScreen Shot 2015-02-25 at 6.28.10 PM

Create Project

Let’s start off with creating a Single View Application:

Screen Shot 2015-02-26 at 7.08.06 AM

Screen Shot 2015-02-26 at 7.08.35 AM


Layout the Screen Design

Once the project is setup click on the projects storyboard (Main.storyboard) add a Scroll View to the view that is presented. You will want to stretch it out so that it uses the entire display for the view.

Once that is complete go ahead and add some Text Fields as children to the Scroll View as well as some labels. Later I am going to explain how to use the scroll view to bring controls which have the focus of the keyboard into view by the user.

For a quick demonstration in this example I designed the following screen:

Screen Shot 2015-02-26 at 10.21.04 PM

Once you have the view setup go ahead and run the application and you will notice whenever you click on a Text Field that once the keyboard comes the bottom Text Fields are covered.

You might also notice that there is no way to dismiss the keyboard.

Dismissing the Keyboard

Whenever someone taps outside of Text Field we need to make sure that the keyboard gets dismissed.

Click on the ViewController.m file and add a UITapGestureRecognizer to the view.

- (void)viewDidLoad {
    [super viewDidLoad];

    UITapGestureRecognizer *recognizer = [[UITapGestureRecognizer alloc] initWithTarget:self action:@selector(hideKeyboard)];
    [[self view] addGestureRecognizer:recognizer];
}

I am going to have it call a method called hideKeyboard which I will use later in other places as well.

-(void)hideKeyboard {
    [[self view] endEditing:YES];
}

Go ahead and run the application again and you should notice now that when you click outside of a Text Field the keyboard is now getting dismissed.

Still haven’t resolved that problem about the keyboard covering up the Text Fields at the bottom so lets start resolving that situation.

View Scrolling with help from NSNotification and Delegates

First step is to wire up the controls to properties in ViewController.h.

Setting up Properties

Click on the storyboard again and when that is up click on the Assistant Editor so that both the storyboard and ViewController.h are displayed.

Screen Shot 2015-01-25 at 3.30.55 PM

Then control drag and create properties for the Scroll View and each of the Text Fields:

@property (weak, nonatomic) IBOutlet UITextField *hiddenTextField;
@property (weak, nonatomic) IBOutlet UITextField *hiddenTextField2;

@property (weak, nonatomic) IBOutlet UITextField *visibleTextField;
@property (weak, nonatomic) IBOutlet UITextField *visibleTextField2;

@property (weak, nonatomic) IBOutlet UIScrollView *scrollView;

After that is done you can close the Assistant Editor so that the ViewController.h is still displayed in the editor.

Add one more property that will be used to track the active control which has the focus of the keyboard:

@property (weak, nonatomic) IBOutlet UIControl *activeField;

 Setting up Delegates for Text Fields

Click on ViewController.m and lets add support for the UITextFieldDelegate.

@interface ViewController ()
<UITextFieldDelegate>

@end

Next we are going to extend the viewDidLoad method so that the ViewController will act as a delegate for each of the UITextField properties that we created:

- (void)viewDidLoad {
    [super viewDidLoad];

    UITapGestureRecognizer *recognizer = [[UITapGestureRecognizer alloc] initWithTarget:self action:@selector(hideKeyboard)];
    [[self view] addGestureRecognizer:recognizer];
    
    [[self hiddenTextField] setDelegate:self];
    [[self hiddenTextField2] setDelegate:self];
    [[self visibleTextField] setDelegate:self];
    [[self visibleTextField2] setDelegate:self];
}

Next we add code to support the textFieldDidBeginEditing method and textFieldDidEndEditing.

We are going to use these methods to help set the active UIControl field which has the focus of the keyboard. In the textFieldDidEndEditing we are also going to hide the keyboard which you will understand as we start dealing with NSNotification for the keyboard events.

-(void) textFieldDidBeginEditing:(UITextField *)textField {
    [self setActiveField:textField];
}

-(void) textFieldDidEndEditing:(UITextField *)textField {
    [self hideKeyboard];
    [self setActiveField:nil];
}

Setting up Notifications for the Keyboard

The final remaining piece is to get notifications for whenever the keyboard is displayed so that the control which is in focus can be scrolled to an area on the screen that is visible to the user.

So that we are properly handling notifications of the appearance of the keyboard for our view we are going to subscribe to UIKeyboardDidShowNotification and UIKeyboardWillHideNotification whenever our view is displayed and when it is no longer being displayed we will remove the subscriptions.

-(void) viewDidAppear:(BOOL)animated {
    [[NSNotificationCenter defaultCenter] addObserver:self selector:@selector(keyboardWasShown:) name:UIKeyboardDidShowNotification object:nil];
    [[NSNotificationCenter defaultCenter] addObserver:self selector:@selector(keyboardWillBeHidden:) name:UIKeyboardWillHideNotification object:nil];
}

-(void) viewDidDisappear:(BOOL)animated {
    [[NSNotificationCenter defaultCenter] removeObserver:self name:UIKeyboardDidShowNotification object:nil];
    [[NSNotificationCenter defaultCenter] removeObserver:self name:UIKeyboardWillHideNotification object:nil];
}

When the keyboard is displayed the goal is to scroll the view if the active control is being hidden by the keyboard. To achieve this use the size of the keyboard as its displayed, this information is include with the userInfo that comes with the notification event. Then compute a CGRect which represents the viewable area and check to see if the active control is inside of it.

If the active control is not in the viewable area then you will want to move the scroll view up so that the active control is positioned just above the keyboard.

- (void)keyboardWasShown:(NSNotification *)notification {
    NSDictionary* info = [notification userInfo];
    
    CGSize keyboardSize = [[info objectForKey:UIKeyboardFrameBeginUserInfoKey] CGRectValue].size;
    
    CGPoint hiddenField = [[self activeField] frame].origin;
    CGFloat hiddenFieldHeight = [[self activeField] frame].size.height;
    
    CGRect visibleRect = [[self view] frame];
    visibleRect.size.height -= keyboardSize.height;
    
    if (!CGRectContainsPoint(visibleRect, hiddenField)) {
        CGPoint scrollPoint = CGPointMake(0.0, hiddenField.y - visibleRect.size.height + hiddenFieldHeight);
        [[self scrollView] setContentOffset:scrollPoint animated:YES];
    }
}

When a notification is received for the keyboard being closed the scroll view needs to be positioned back to its normal position.

- (void)keyboardWillBeHidden:(NSNotification *)notification {
    [[self scrollView] setContentOffset:CGPointZero animated:YES];
}

If you run the app you will notice now that the text fields normally hidden by keyboard are scrolling to just above the keyboard when they receive focus. The only work that remains now is giving the user ability to switch from one Text to another using the return key on the keyboard.

Enabling the Return Key for Text Fields

This is an added feature that I like to use whenever I have a screen with multiple text fields and I want the user to be able to flow from one field to another with only having to using the Return key.

Open the storyboard and for each Text Field on the view you will want to set the Auto-enable Return Key under the Attributes Selector.

Screen Shot 2015-02-27 at 3.02.52 PM

Screen Shot 2015-02-27 at 3.03.36 PM

Then you will want to add a method to handle textFieldShouldReturn that will be called for your view.

-(BOOL) textFieldShouldReturn:(UITextField *)textField {
    if (textField == [self visibleTextField]) {
        [self hideKeyboard];
        [[self visibleTextField2] becomeFirstResponder];
    } else if (textField == [self visibleTextField2]) {
        [self hideKeyboard];
        [[self hiddenTextField2] becomeFirstResponder];
    } else if (textField == [self hiddenTextField2]) {
        [self hideKeyboard];
        [[self hiddenTextField] becomeFirstResponder];
    } else if (textField == [self hiddenTextField]) {
        [self hideKeyboard];
    }
    
    return YES;
}

If you run the app now you will notice that as you type in each text field the Return key is enabled and if you click it they focus for the keyboard moves to the next field on the form. At the last Text Field I am currently hiding the keyboard but you could easily add some field validations here or anything else you might want to do when the user is done.

For now you can find the source here and as always Happy Coding!!!

Using MapKit and CoreLocation Information in iOS 8

I have been working on an application that will display the current users information along with other information in his/her surrounding area and thought to share my findings regarding MapKit, CoreLocation and iOS 8 in a simple application for others to use.

I used Introduction to MapKit in iOS 6 Tutorial and Getting the user’s location using CoreLocation as a foundation to help get me started. I found however that both articles are missing the information needed to display and get the users current information with iOS 8.

Create the Project

Let’s start off with creating a Single View Application:

Screen Shot 2015-01-25 at 12.11.08 PM

Screen Shot 2015-01-25 at 12.11.52 PM

Once the project has been created the next step is to make sure that the MapKit and CoreLocation frameworks are added into the project.

Screen Shot 2015-01-25 at 12.33.26 PM

Laying Out the Screen Design

Now that we have the project requirements taken care of let’s move to laying out the screen. By clicking on the Main.storyboard you’ll get the blank View that comes configured with the project. Drag a MKMapView to the top half of the view and then below that add a group of labels that the application will use to display Latitude, Longitude and Altitude.

Screen Shot 2015-01-25 at 3.12.57 PM

Time to Make it All Work

If you want you can run the application and what you’ll see is the map displayed and the labels sitting blank. While the achievement gives as much excitement as a “Hello World” application it really is lacking the level of excitement that comes as you interact with the user.

The first step in creating that interaction is to wire the storyboard we just designed into the code for the application. With the storyboard still displayed I am going to change to the Assistant Editor so that both the Storyboard view and the header (ViewController.h) are displayed next to each other.

Screen Shot 2015-01-25 at 3.30.55 PM

In the header file I am going to import CoreLocation.h and MapKit.h.

#import <MapKit/MapKit.h>
#import <CoreLocation/CoreLocation.h>

Before wiring things let’s create create a property for dealing with location information:

@property (nonatomic, strong) CLLocationManager *locationManager;

Now lets proceed by control dragging the Labels and MKMapView that our code will have to interact with into the header file.

#import <UIKit/UIKit.h>
#import <MapKit/MapKit.h>
#import <CoreLocation/CoreLocation.h>

@interface ViewController : UIViewController

@property (nonatomic, strong) CLLocationManager *locationManager;
@property (weak, nonatomic) IBOutlet MKMapView *mapView;
@property (weak, nonatomic) IBOutlet UILabel *labelLatitude;
@property (weak, nonatomic) IBOutlet UILabel *labelLongitude;
@property (weak, nonatomic) IBOutlet UILabel *labelAltitude;

@end

As we now move on to the implementation of ViewController.m we are left with making sure that the locationManager is started and that our mapView knows to display the current location of where our user is located.

At the top of ViewController.m add some helper definitions that we’ll use in converting metrics to feet and miles.

#define METERS_MILE 1609.344
#define METERS_FEET 3.28084

In the interface section lets make sure to add the CLLocationManagerDelegate as a delegate that the ViewController will implement part of.

@interface ViewController ()
<CLLocationManagerDelegate>

@end

Then in the viewDidLoad method we are going to add the code to start the location manager and have the mapView display the users current location.

- (void)viewDidLoad {
    [super viewDidLoad];

    [[self mapView] setShowsUserLocation:YES];
    
    self.locationManager = [[CLLocationManager alloc] init];
    
    [[self locationManager] setDelegate:self];
    [[self locationManager] setDesiredAccuracy:kCLLocationAccuracyBest];
    [[self locationManager] startUpdatingLocation];
}

Finally make sure to wire up part of the CLLocationManagerDelegate so that we can begin receiving location information from the users current location.

-(void) locationManager:(CLLocationManager *)manager didUpdateLocations:(NSArray *)locations {
    CLLocation *location = locations.lastObject;
    [[self labelLatitude] setText:[NSString stringWithFormat:@"%.6f", location.coordinate.latitude]];
    [[self labelLongitude] setText:[NSString stringWithFormat:@"%.6f", location.coordinate.longitude]];
    [[self labelAltitude] setText:[NSString stringWithFormat:@"%.2f feet", location.altitude*METERS_FEET]];
}

With that all complete go ahead and run the application.

Screen Shot 2015-01-25 at 3.49.43 PM

What gives??  The pulsating blue dot and location information at the bottom are missing plus we were never prompted by iOS to give the application the permission to use our current location. With some further inspection you should also see some exception information about not being able to start the location manager.

In iOS 8 there is now an added step that applications must take in being authorized to receive location information. Depending on the location services that your application needs to use there are the following requests:

In the notes for requestAlwaysAuthorization you will see that Apple has identified privacy concerns and warns about its use. For this application we only need to use requestWhenInUseAuthorization so I will leave the other as further reading to those interested.

Changes for iOS 8

Change the the viewDidLoad method so that we are now requesting authorization as required with iOS 8.

NOTE – While iOS 8 is enjoying a fairly large installation rate I am still going to make sure that the code works with iOS 7. To do this I am going to query the locationManager to see if it supports this new method.

- (void)viewDidLoad {
    [super viewDidLoad];

    [[self mapView] setShowsUserLocation:YES];
    
    self.locationManager = [[CLLocationManager alloc] init];
    
    [[self locationManager] setDelegate:self];
    
    // we have to setup the location maanager with permission in later iOS versions
    if ([[self locationManager] respondsToSelector:@selector(requestWhenInUseAuthorization)]) {
        [[self locationManager] requestWhenInUseAuthorization];
    }
    
    [[self locationManager] setDesiredAccuracy:kCLLocationAccuracyBest];
    [[self locationManager] startUpdatingLocation];
}

Now all that remains is to add NSLocationWhenInUseUsageDescription into Info.plist.

Screen Shot 2015-01-25 at 4.30.23 PM

Run the app now.

Screen Shot 2015-01-25 at 4.40.56 PM

There is that pulsating blue dot and now our application is showing us where the users current location is. The zoomed out view might be a bit extreme and in my opinion isn’t going to be very useful for most users.

Focus and Zoom the Map

As soon as we get the users location information lets zoom the map more into the location for where the user located.

-(void) locationManager:(CLLocationManager *)manager didUpdateLocations:(NSArray *)locations {
    CLLocation *location = locations.lastObject;
    [[self labelLatitude] setText:[NSString stringWithFormat:@"%.6f", location.coordinate.latitude]];
    [[self labelLongitude] setText:[NSString stringWithFormat:@"%.6f", location.coordinate.longitude]];
    [[self labelAltitude] setText:[NSString stringWithFormat:@"%.2f feet", location.altitude*METERS_FEET]];
    
    // zoom the map into the users current location
    MKCoordinateRegion viewRegion = MKCoordinateRegionMakeWithDistance(location.coordinate, 2*METERS_MILE, 2*METERS_MILE);
    [[self mapView] setRegion:viewRegion animated:YES];
}

Run the app now.

Screen Shot 2015-01-25 at 4.52.27 PM

There you have it!!!  For now you can find the source here and as always Happy Coding.