Many years ago when I was learning Objective-C my initial impression of protocols and delegates was one of confusion. When I first started reading and learning about them and their idea I was expecting something hard to totally comprehend and most likely difficult to implement.
Very shortly however I began to realize that it was neither.
Protocols
I think that Apple gives a great description for a protocol.
A protocol defines a blueprint of methods, properties, and other requirements that suit a particular task or piece of functionality.
A more simple example (non programming) of protocols is the process of building a house.
You start first with the creation of a set of architectural drawings that are printed (blueprints) and distributed to the various contractors whose responsibility is to create an implementation. Think of protocols as the architects printed blueprints and the implementation of them as the actual house being constructed.
Back to the programming world, and for those that are new to Swift, think of protocols as abstract interfaces which allow you define an interface to be used in the construction of an object.
Delegates
The process of delegation allows you (the delegator) to notify another object or hand over work to another object (the delegate) which has an interest in your execution. In my opinion you will see it used most often as a form of notification from one object to another.
For the MVC purists that are out there you will most likely be familiar to delegates as the Observer Pattern that glues everything together.
Putting it All Together
In the sample application I am going to demonstrate how you can use a protocol to implement functions used for the purposes of notification as well as how to use them to get information from the delegate.
In the application there will be a button that when clicked runs an asynchronous function which will repeat a unit of work based on a counter. To create some delay and simulate that each unit of work is actually doing something I added a sleep call for one second.
While the asynchronous function is running I want it to do the following:
- Notify when work has started
- Ask the delegate how many units of work it should execute
- Notify when work has completed
- Optionally I would like for it to update me as each unit of work is complete.
Let’s get started.
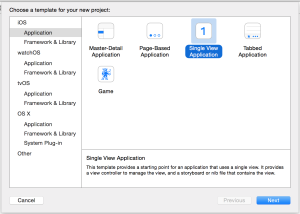
Create Project
Start off with creating a Single View Application:

Layout Screen
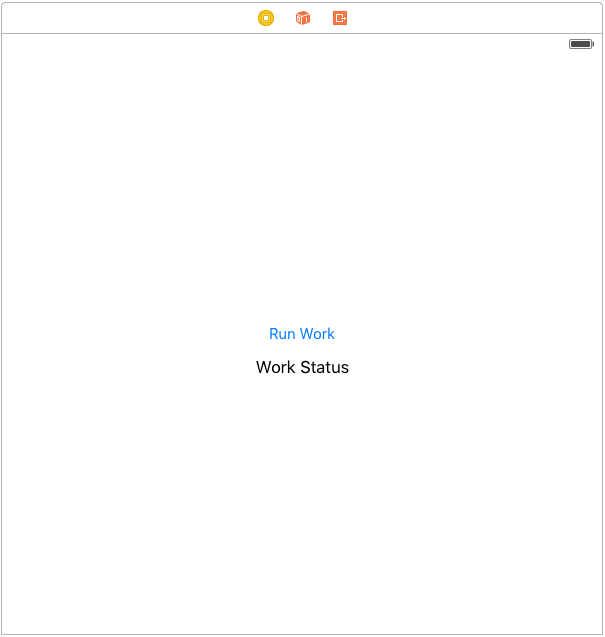
With the project setup complete click on the projects storyboard (Main.storyboard) and add a Label for a status that will get displayed and a button labeled Run Work.
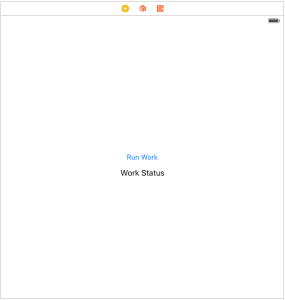
Once you have added those fields and the constraints in place go ahead and give it a test run in the simulator.
With the storyboard editor still open click on the Assistant Editor so that both the storyboard and ViewController.swift are displayed.

Then control drag and create a property for the Label as well as a function to handle Run Work button when it is clicked.
    @IBOutlet weak var labelWorkStatus: UILabel!

    @IBAction func runWork(sender: AnyObject) {
    }
After that is done you can close the Assistant Editor and you will now begin to work on the code.
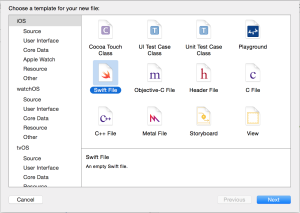
Create the Protocol
Next you will want to add a new file for the protocol.
A basic protocol would be defined as follows:
protocol ProtoExample {
    // add your definitions here
}
Here is the code that you will want to paste for the protocol that will be implemented. There are be a couple of parts to this that are different from the normal that I will explain.
@objc protocol ProtoExample {
    var workTime : UInt32 { get }

    func workIsStarting()
    func workIsComplete()

    optional func workInProgress()
}
Protocol definitions are fairly straightforward when you look at them. You basically define the layout of the function that you expect to be implemented much like you would in any other class. The exception of course is that you don’t supply an implementation.
When dealing with properties you have to make sure that you define them with a var in the front and then follow them with their access method (get set). If you wanted to create a property with a get and set access it would look like the following:
var workTime : UInt32 { get set }
What about that @objc that I added to the front of the protocol definition?
In the requirements I discussed the option of getting notifications as the work progresses. In order to achieve this I marked the workInProgress function as optional meaning that the implementor of the protocol would not be required to implement this. In order to make use of this keyword you have to also mark your protocol with @objc.
Adding this attribute doesn’t require you to now use Objective-C in your development. The only downside that comes from marking the protocol this way is that it means only class objects can inherit from your protocol.
You can get more information about the @objc attribute here.
Create the Model
Next you will want to create the model which will implement the asynchronous function as well as use the delegate the protocol was designed for.
The requirements for the model are simple so lets just create an asynchronous function that makes use of the protocol. I am not going to go into the details of queues and asynchronous programming but for those that want more information you can read a great article about asynchronous operations for iOS here.
class ProtoModel {
    var delegate : ProtoExample?

    func doSomeProcessing() {
        dispatch_async(dispatch_get_global_queue(DISPATCH_QUEUE_PRIORITY_DEFAULT, 0), { () -> Void in
            // let them know that we are starting
            dispatch_async(dispatch_get_main_queue(), { () -> Void in
                self.delegate?.workIsStarting()
            })

            // do some stuff
            var workTime : UInt32 = 0
            if let del = self.delegate {
                workTime = del.workTime
            }

            while 0 < workTime { sleep(1) dispatch_async(dispatch_get_main_queue(), { () -> Void in
                    self.delegate?.workInProgress?()
                })

                workTime--
            }

            dispatch_async(dispatch_get_main_queue(), { () -> Void in
                self.delegate?.workIsComplete()
            })
        })
    }
}
In this example the delegate is not mandatory for execution. I did this intentionally to demonstrate how the delegate would be used in the common scenarios where users may not be interested in the notifications.
If you wanted to make the delegate a requirement then you would change the code to look more like the following:
class ProtoModel {
    var delegate : ProtoExample

    init (delegate: ProtoExample) {
        self.delegate = delegate
    }

    func doSomeProcessing() {
        dispatch_async(dispatch_get_global_queue(DISPATCH_QUEUE_PRIORITY_DEFAULT, 0), { () -> Void in
            // let them know that we are starting
            dispatch_async(dispatch_get_main_queue(), { () -> Void in
                self.delegate.workIsStarting()
            })

            // do some stuff
            var workTime = self.delegate.workTime

            while 0 < workTime { sleep(1) dispatch_async(dispatch_get_main_queue(), { () -> Void in
                    self.delegate.workInProgress?()
                })

                workTime--
            }

            dispatch_async(dispatch_get_main_queue(), { () -> Void in
                self.delegate.workIsComplete()
            })
        })
    }
}
A couple of simple things to notice is that the property is no longer marked as optional and with that comes the requirement of the init constructor. Also notice how the calls using the delegate have changed.
But wait the signature to the workInProgress still has the optional tag. This is because if you recall the function was flagged with the optional keyword.
Implementing the Protocol
To implement the protocol open the ViewController.swift and make the required changes so that it inherits from and implements the protocol.
In this example you can make note that the optional function we defined is not being used. This is allowed because of the optional attribute we assigned to the function.
class ViewController: UIViewController, ProtoExample {

    @IBOutlet weak var labelWorkStatus: UILabel!

    // implement the protocol
    var workTime : UInt32 { return 10 }

    func workIsComplete() {
        labelWorkStatus.text = "Work is Complete"
    }

    func workIsStarting() {
        labelWorkStatus.text = "Work is Starting"
    }
Add the model as an optional property and make sure that it is created in the viewDidLoad function.
    var protoModel : ProtoModel?

    override func viewDidLoad() {
        super.viewDidLoad()

        // create and setup the model
        self.protoModel = ProtoModel()
        self.protoModel?.delegate = self

        // setup the view
        labelWorkStatus.text = "Ready for Work"
    }
Finally change the handler for when the button gets clicked so that it will call the asynchronous function doSomeProcessing created in the model.
    @IBAction func runWork(sender: AnyObject) {
        if let model = self.protoModel {
            labelWorkStatus.text = "Work is requested"
            model.doSomeProcessing()
        }
    }
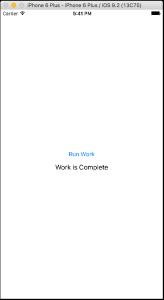
With all that complete go ahead and run the application, click the button and you should see the status being updated as the function doSomeProcessing progresses.
For now you can get complete the source here and as always Happy Coding!!!