I have been working on an application that has a screen where a user can view and edit their profile information. One of the problems that I have had to confront is that certain fields were getting covered by the keyboard and making it impossible for the user to be able to enter or update information.
Certainly this had to be answered by someone on Stack Overflow or somewhere else in the land of the internet that Google has had a chance to index. I found ideas and some samples out there but nothing that really dealt with a way to handle a screen that might have multiple UIControls getting hidden.
I found How to make UITextField move up when keyboard is present which gave some ideas and helped to serve how I resolved my situation. One of the areas of interest is the demonstration about how to get the size of the keyboard. With today’s varying size iPhones this is important because for each device the keyboard changes in its display size. It actually is a great read so if you haven’t already reviewed it let me give you a few minutes to go check it out.
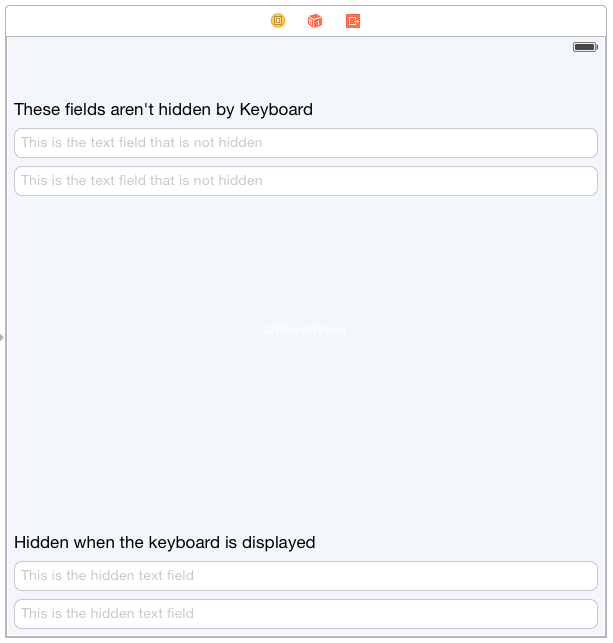
In the sample application I am going to create a view that has two UITextFields that will be visible when the keyboard and another 2 that are hidden when the keyboard comes up.
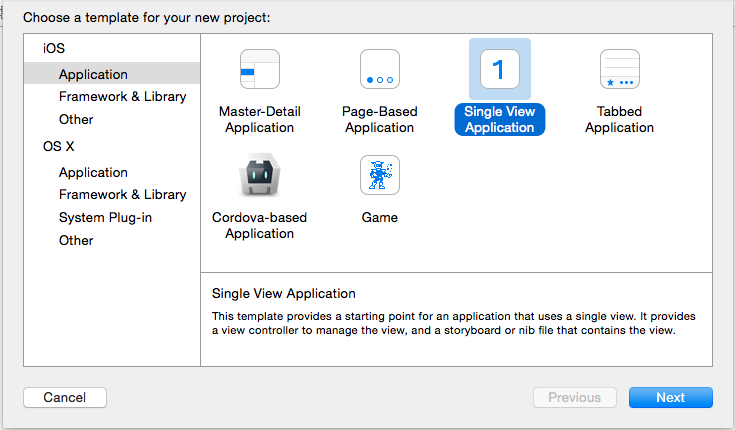
Create Project
Let’s start off with creating a Single View Application:

Layout the Screen Design
Once the project is setup click on the projects storyboard (Main.storyboard) add a Scroll View to the view that is presented. You will want to stretch it out so that it uses the entire display for the view.
Once that is complete go ahead and add some Text Fields as children to the Scroll View as well as some labels. Later I am going to explain how to use the scroll view to bring controls which have the focus of the keyboard into view by the user.
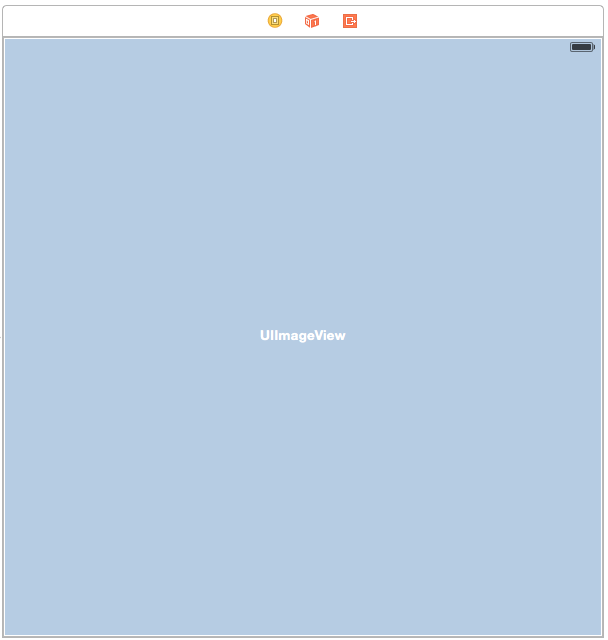
For a quick demonstration in this example I designed the following screen:
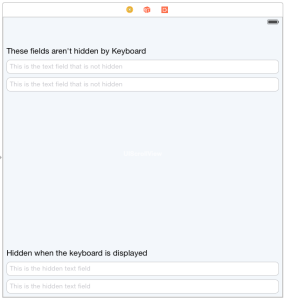
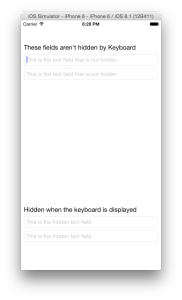
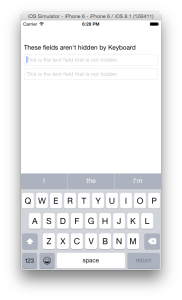
Once you have the view setup go ahead and run the application and you will notice whenever you click on a Text Field that once the keyboard comes the bottom Text Fields are covered.
You might also notice that there is no way to dismiss the keyboard.
Dismissing the Keyboard
Whenever someone taps outside of Text Field we need to make sure that the keyboard gets dismissed.
Click on the ViewController.m file and add a UITapGestureRecognizer to the view.
- (void)viewDidLoad {
    [super viewDidLoad];

    UITapGestureRecognizer *recognizer = [[UITapGestureRecognizer alloc] initWithTarget:self action:@selector(hideKeyboard)];
    [[self view] addGestureRecognizer:recognizer];
}
I am going to have it call a method called hideKeyboard which I will use later in other places as well.
-(void)hideKeyboard {
    [[self view] endEditing:YES];
}
Go ahead and run the application again and you should notice now that when you click outside of a Text Field the keyboard is now getting dismissed.
Still haven’t resolved that problem about the keyboard covering up the Text Fields at the bottom so lets start resolving that situation.
View Scrolling with help from NSNotification and Delegates
First step is to wire up the controls to properties in ViewController.h.
Setting up Properties
Click on the storyboard again and when that is up click on the Assistant Editor so that both the storyboard and ViewController.h are displayed.

Then control drag and create properties for the Scroll View and each of the Text Fields:
@property (weak, nonatomic) IBOutlet UITextField *hiddenTextField;
@property (weak, nonatomic) IBOutlet UITextField *hiddenTextField2;

@property (weak, nonatomic) IBOutlet UITextField *visibleTextField;
@property (weak, nonatomic) IBOutlet UITextField *visibleTextField2;

@property (weak, nonatomic) IBOutlet UIScrollView *scrollView;
After that is done you can close the Assistant Editor so that the ViewController.h is still displayed in the editor.
Add one more property that will be used to track the active control which has the focus of the keyboard:
@property (weak, nonatomic) IBOutlet UIControl *activeField;
Setting up Delegates for Text Fields
Click on ViewController.m and lets add support for the UITextFieldDelegate.
@interface ViewController ()
<UITextFieldDelegate>

@end
Next we are going to extend the viewDidLoad method so that the ViewController will act as a delegate for each of the UITextField properties that we created:
- (void)viewDidLoad {
    [super viewDidLoad];

    UITapGestureRecognizer *recognizer = [[UITapGestureRecognizer alloc] initWithTarget:self action:@selector(hideKeyboard)];
    [[self view] addGestureRecognizer:recognizer];

    [[self hiddenTextField] setDelegate:self];
    [[self hiddenTextField2] setDelegate:self];
    [[self visibleTextField] setDelegate:self];
    [[self visibleTextField2] setDelegate:self];
}
Next we add code to support the textFieldDidBeginEditing method and textFieldDidEndEditing.
We are going to use these methods to help set the active UIControl field which has the focus of the keyboard. In the textFieldDidEndEditing we are also going to hide the keyboard which you will understand as we start dealing with NSNotification for the keyboard events.
-(void) textFieldDidBeginEditing:(UITextField *)textField {
    [self setActiveField:textField];
}

-(void) textFieldDidEndEditing:(UITextField *)textField {
    [self hideKeyboard];
    [self setActiveField:nil];
}
Setting up Notifications for the Keyboard
The final remaining piece is to get notifications for whenever the keyboard is displayed so that the control which is in focus can be scrolled to an area on the screen that is visible to the user.
So that we are properly handling notifications of the appearance of the keyboard for our view we are going to subscribe to UIKeyboardDidShowNotification and UIKeyboardWillHideNotification whenever our view is displayed and when it is no longer being displayed we will remove the subscriptions.
-(void) viewDidAppear:(BOOL)animated {
    [[NSNotificationCenter defaultCenter] addObserver:self selector:@selector(keyboardWasShown:) name:UIKeyboardDidShowNotification object:nil];
    [[NSNotificationCenter defaultCenter] addObserver:self selector:@selector(keyboardWillBeHidden:) name:UIKeyboardWillHideNotification object:nil];
}

-(void) viewDidDisappear:(BOOL)animated {
    [[NSNotificationCenter defaultCenter] removeObserver:self name:UIKeyboardDidShowNotification object:nil];
    [[NSNotificationCenter defaultCenter] removeObserver:self name:UIKeyboardWillHideNotification object:nil];
}
When the keyboard is displayed the goal is to scroll the view if the active control is being hidden by the keyboard. To achieve this use the size of the keyboard as its displayed, this information is include with the userInfo that comes with the notification event. Then compute a CGRect which represents the viewable area and check to see if the active control is inside of it.
If the active control is not in the viewable area then you will want to move the scroll view up so that the active control is positioned just above the keyboard.
- (void)keyboardWasShown:(NSNotification *)notification {
    NSDictionary* info = [notification userInfo];

    CGSize keyboardSize = [[info objectForKey:UIKeyboardFrameBeginUserInfoKey] CGRectValue].size;

    CGPoint hiddenField = [[self activeField] frame].origin;
    CGFloat hiddenFieldHeight = [[self activeField] frame].size.height;

    CGRect visibleRect = [[self view] frame];
    visibleRect.size.height -= keyboardSize.height;

    if (!CGRectContainsPoint(visibleRect, hiddenField)) {
        CGPoint scrollPoint = CGPointMake(0.0, hiddenField.y - visibleRect.size.height + hiddenFieldHeight);
        [[self scrollView] setContentOffset:scrollPoint animated:YES];
    }
}
When a notification is received for the keyboard being closed the scroll view needs to be positioned back to its normal position.
- (void)keyboardWillBeHidden:(NSNotification *)notification {
    [[self scrollView] setContentOffset:CGPointZero animated:YES];
}
If you run the app you will notice now that the text fields normally hidden by keyboard are scrolling to just above the keyboard when they receive focus. The only work that remains now is giving the user ability to switch from one Text to another using the return key on the keyboard.
Enabling the Return Key for Text Fields
This is an added feature that I like to use whenever I have a screen with multiple text fields and I want the user to be able to flow from one field to another with only having to using the Return key.
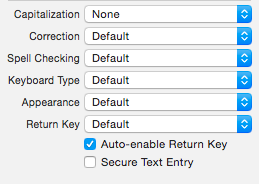
Open the storyboard and for each Text Field on the view you will want to set the Auto-enable Return Key under the Attributes Selector.

Then you will want to add a method to handle textFieldShouldReturn that will be called for your view.
-(BOOL) textFieldShouldReturn:(UITextField *)textField {
    if (textField == [self visibleTextField]) {
        [self hideKeyboard];
        [[self visibleTextField2] becomeFirstResponder];
    } else if (textField == [self visibleTextField2]) {
        [self hideKeyboard];
        [[self hiddenTextField2] becomeFirstResponder];
    } else if (textField == [self hiddenTextField2]) {
        [self hideKeyboard];
        [[self hiddenTextField] becomeFirstResponder];
    } else if (textField == [self hiddenTextField]) {
        [self hideKeyboard];
    }

    return YES;
}
If you run the app now you will notice that as you type in each text field the Return key is enabled and if you click it they focus for the keyboard moves to the next field on the form. At the last Text Field I am currently hiding the keyboard but you could easily add some field validations here or anything else you might want to do when the user is done.
For now you can find the source here and as always Happy Coding!!!